
Get started with a template
With Maparoni, you can create personalised and compelling maps that can be shared and followed by others. These maps are called collections and you can begin a new collection with a template. Each template comes pre-installed with a set of fields and views, which you can use as a starting point. Replace the templates’ example locations or routes with your own and add more as needed.
Create a collection from a template
-
To open Maparoni, click or tap on the Maparoni icon on your device.
Click the “+” icon in the top left corner of the Maparoni window on Mac OS or in the top right corner on iOS to bring up the template chooser. You can also go to File > New Collection on the Mac OS app.

-
In the template chooser, browse the list of templates or choose the first “Blank” template to start without a template. Select one and click “create” to open it.
-
To add your own content to the collection, do the following:
- To add a location: Start searching for a location using the searchbar or drop a pin by clicking or tapping on the map and hold down until the pin appears. Now you can start entering your own data into the fields.
Note: If you started with a blank template, no custom fields have been created yet. Learn how to create new custom fields in the “Add custom fields” chapter. - To add a route: Click or tap on the draw icon in the tooldbar to activate the drawing mode. Use your mouse, finger, or pencil on the iPad to draw a route. After you’ve finished drawing, press the drawing icon again to deactivate the drawing mode and save the route. The route will be automatically added to your collection.
- To add a location: Start searching for a location using the searchbar or drop a pin by clicking or tapping on the map and hold down until the pin appears. Now you can start entering your own data into the fields.
-
After you’ve added a new location or route, you can start adding your own data to these items. The available fields are different depending on the template that you have selected.
To view these fields, select the location or route in the list or on the map. The available fields will appear in the inspector panel on desktop or on a card on your mobile device.
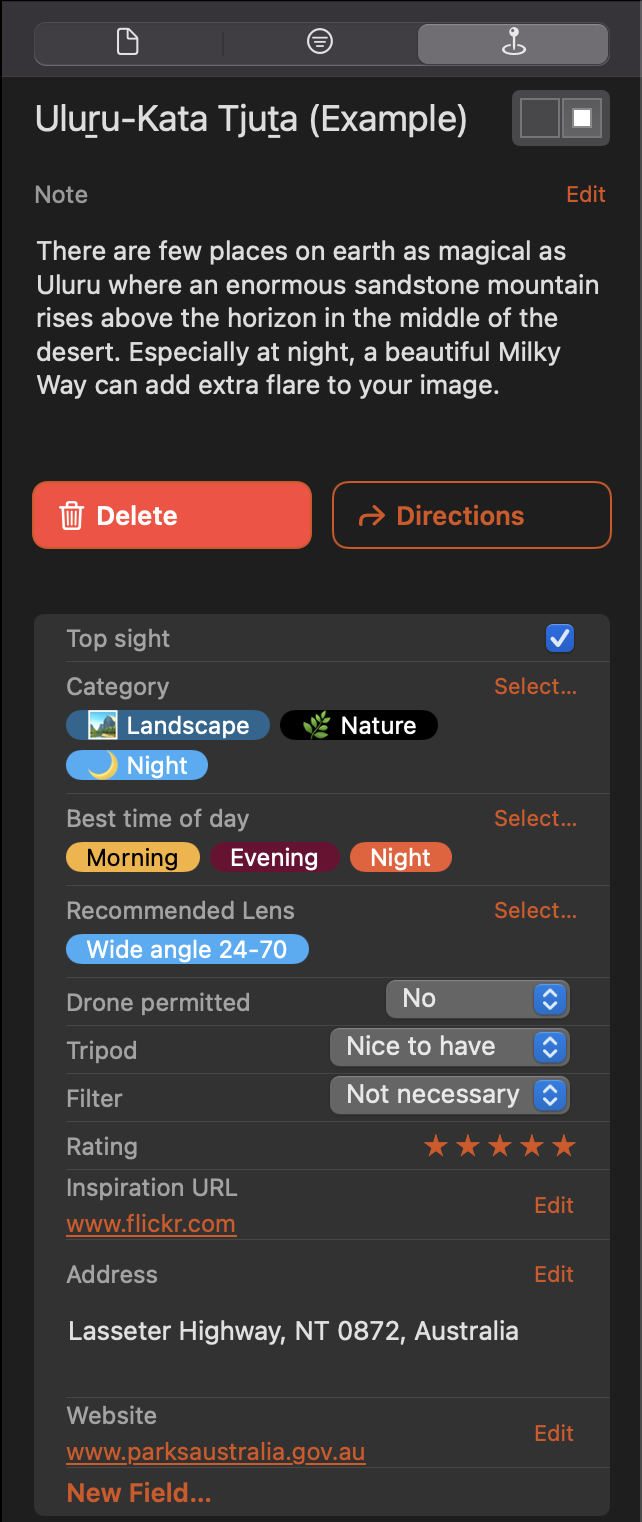
See an example of the available fields of a dropped pin inside the photo guide template:

After information has been entered, the location could look like this:
-
Once you’ve added locations or routes to your collection, you can then filter, group or sort them by the different fields, you can show a computed subtitle in the list, and you can change how the collection should appear on the map. Find these options under the filter icon in the inspector panel. Under “Presets”, you will find viewing presets that came pre-installed with the template.
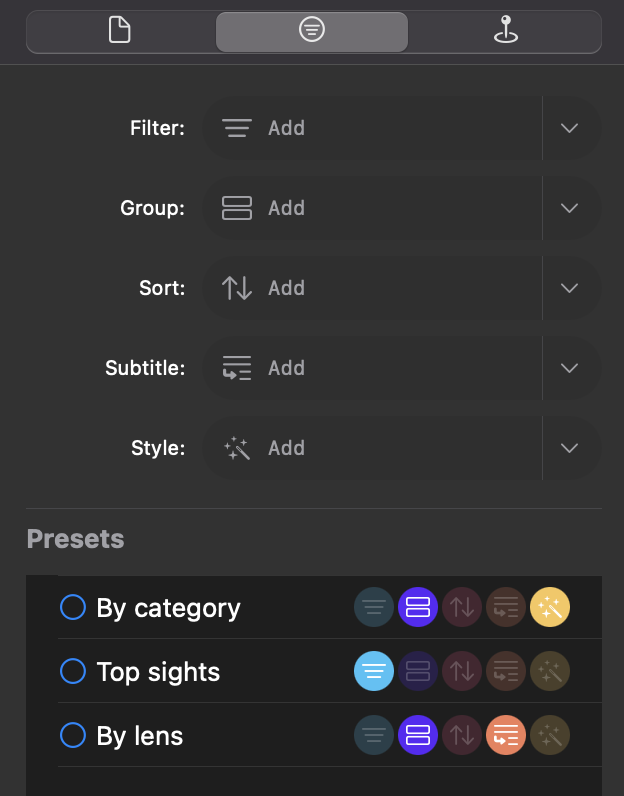
To activate the view, select the circle in front of the preset title. Click the selected circle again to deactivate. To learn more about how views work and how you can create your own, view the Filter, sort, group and more page.
-
To exit the collection when you’re finished, select another collection in the side panel on desktop or press the back button in the top left corner on mobile. Your collection will save automatically, so you won’t lose any of your work.